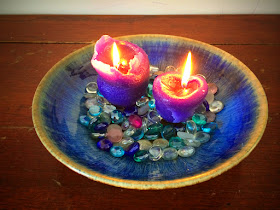
Ever since I was a kid I've always wanted to try making candles in the snow and today was the day!!! Such a cool experiment! I just love how they turned out! The sides of the SNOW CANDLES have this beautiful texture created by the crystals of snow. Just like snowflakes, each snow candle is unique!
This is definitely a craft that should be done with adult supervision, though it is a fun one for kids of all ages.
Materials needed:
-snow
-paraffin wax
-crayons
-candle wicks
-med/large pot for water
-tin can or candle pouring pot
-stick
First, decide what color you want your candles to be. Pick out 5 or 6 crayons all similar in color. L chose purples for our candles. Using a knife, cut a slit down the side of the crayon papers and peel the paper off.
Fill your pot with water about an inch high. Next place your pouring pot or tin can in the water creating a double boiler. (If using a tin can, make sure it is clean and the paper has been removed.) Place 3 blocks of paraffin wax and your crayons into the pouring pot or can. Bring the water to a boil, then turn the heat down to med-low so it's at a simmer. ***Never melt wax directly on the stove top without the double boiler! The high heat may cause a fire!***
Watch as the crayons and wax melt completely. Turn the stovetop off as you go outside to prepare your candle molds.
Outside you'll need about a foot of snow. If the snow isn't deep enough, you can use your hands to pile it up and lightly pack it down. Using a stick or a spoon handle, dig a little hole in the snow. We made ours about 4 inches deep and 1 to 2 inches wide.
Back inside, turn the stove back on for a couple minutes to heat up the wax again. Gather your candle wicks. When you're ready, carefully remove the pouring pot or tin can (using an oven mitt) and quickly go outside to pour the wax into your molds. After a couple minutes, insert the wicks into your candles and hold in place until the wax hardens a bit...about 4-5 minutes.
Leave your candles in the snow for an hour to harden completely. As the wax hardens, the candles take on their funky shape and texture. So cool!
Once they have hardened, carefully dig the candles out of the snow with your hands. Inside, use a knife to shave off some of the bottom of the candles if needed, so they will sit flat. Using scissors, trim the wicks to 1/2 inch high.
Arrange on a dish or in a large bowl, add some decorative "fairy stones" if you like and enjoy!!! Beautiful!!!


No comments:
Post a Comment