Showing posts with label science experiments. Show all posts

Wednesday, July 15, 2015

DIY Toy Catapult

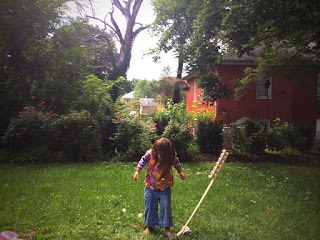
What kid (or adult) doesn't love launching things through the air? This DIY TOY CATAPULT takes only minutes to put together and your kids will play with it for hours...days even! I love how kids naturally experiment while playing with this toy. Even as young as three, L was moving the can (the fulcrum) around, placing the balls in various slots, and went on to launch her toy parachute, as well as her shoes! So much fun!!!


Materials needed:
-yard stick
-can of food 
-egg carton
-scissors
-hot glue gun
-permanent markers (optional)

Things to launch:
-ping pong balls
-pom poms
-cotton balls
-plastic figurines (fairies, dinosaurs, army men)
-marshmallows or cereal (to catch in one's mouth)


First, cut your egg carton in half.


Using a hot glue gun, glue the egg carton onto one end of your yard stick. (Don't worry...when your kids are done playing with their catapult, the egg carton and glue should peel right off the yard stick! I take ours apart every time we're finished playing with it!)


Next, number your egg carton slots and your ping pong balls. This step is optional, but it makes it easy to keep track of what ball goes the farthest and which slots you're putting things into...especially if you're launching multiple balls at once!


The set-up of your catapult is easy...just place the can on it's side in the grass (keeps it from rolling) and place the yardstick on top. Fill the slots with your projectiles!


Now, time to play!!!
Launching balls...


 Parachutes...


 And L's shoes...


What will you all send flying through the air???

If your kids like the catapult, they'll definitely love making POCKET PARACHUTES...another "make something from nothing" craft! Enjoy!


Wednesday, June 17, 2015

Fizzy Ice Chalk Fun

After we made "Homemade Sidewalk Chalk" the other day, I couldn't wait to make some FIZZY ICE CHALK as well! I looked around online and found all kinds of recipes and methods for ice-chalk and fizzy or erupting ice-chalk. L and I experimented and tried all the tricks...we added some of our own variations, and I'm happy to share those that worked best! I suggest making FIZZY ICE CHALK in the morning on a hot summer day, let it set-up for a few hours, and bring it outside to play with in the afternoon. We have a few batches sitting in our freezer right now, just waiting for a lull in the action so we can bring it outside to play with again. This time we made lots so there'd be plenty for the neighborhood kids to play with as well! We can't wait!


Materials needed:
-1/2 cup cornstarch
-1/2 cup baking soda
-food coloring (or tempera paint)
-1 cup water
-measuring cup
-silicone molds (or ice tray)
-spoon
-toothpicks
-vinegar
-spray bottle, squirt bottle, or infant medicine dropper


Using a measuring cup, combine 1/2 cup cornstarch with 1/2 cup baking soda. Mix together with a fork or spoon.


Add 1 cup water and mix gently, but thoroughly. 


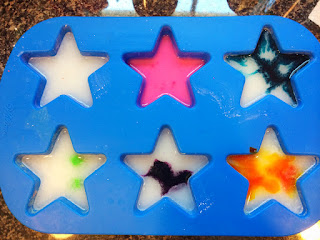
Next, carefully pour your mixture into the silicone molds or into your ice tray. If you don't have either available, you could use paper cups as well!


Add a few drops of food coloring or a squirt of tempera paint to each mold. (We tried both...the food coloring mixed better, but both worked fine!)


Using toothpicks, carefully mix each color. 


Put the molds into the freezer for a few hours, til they set-up completely.


Before bringing the ice chalk out to play with, prepare your vinegar. You can put it into spray bottles, into squirt bottles (empty dish soap bottles work great), or pour the vinegar into small cups paired with a medicine dropper. All are great for little hands and developing motor skills...L's favorite is the medicine dropper method!


After the ice chalk is thoroughly frozen, bring it outside to play! One page online suggested painting the sidewalk first with water...we tried it, but didn't see much benefit in having the pavement wet. We had more fun coloring with the chalk on dry pavement! Experiment with it though...see what works for you! 


After the kids are finished coloring (if they can wait that long!), it's time to bring out the vinegar. Spray or squirt the vinegar onto the ice-chalk and the ice-chalk pictures to watch it sizzle, fizz and erupt! This is definitely everyone's favorite part! 


Take a moment to talk to your kids about chemical reactions and the result of a base (the baking soda) and an acid (the vinegar) coming together. L always likes to taste how salty the baking soda is compared to the sour smell of the vinegar. Summer science fun...I just love it! Enjoy!!!

Wednesday, June 10, 2015

DIY Pocket Parachute

What kid doesn't love throwing a toy parachute around?!! And what parent doesn't love a toy that costs nothing, takes less than 5 minutes to make, and entertains your kids for hours on end?!! I made this DIY POCKET PARACHUTE for L on a rainy day last week...as soon as there was a break in the weather, we were out the door throwing the parachute all around town. L dropped the parachute off the steps of the old courthouse, a church, the library, a little pavilion stage, and she climbed up a tree and dropped it down as well. This pocket parachute is so simple, so easy, and so much fun!!!


Materials needed:
-plastic bag
-food pouch cap
-string
-scissors
-an awl (or screwdriver)


If you don't have a food pouch cap, a toy wheel, some safety pins, paper clips or a wine cork could be used as well...get creative with what you have on hand! 

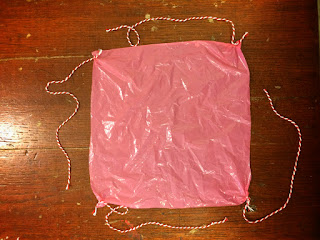
First, cut the plastic bag into a square at least 12x12 inches.


Cut your string into 4 equal pieces, all approximately 15 inches long. 


Using the awl, carefully poke a hole through the center of the food pouch cap. 


Also, poke holes into each corner of the square you cut from the plastic bag. Make each hole 1/2 an inch from the edges.


Tie a piece of string onto each corner, using a double knot. 


Next, gather all the strings together and tie them together with one overhand knot, about 3 inches from the end. 


Thread two of the strings through the center of the food pouch cap and thread the other two through the side. Tie the ends together with a double knot. 


Too easy, right? Now time to play!!! It's just as much fun trying to catch the parachute as it is to throw it!


If your kids are older, they can experiment by making various parachutes...some out of bigger pieces of plastic, longer strings and cutting a hole in the center parachute as well. Enjoy!!!