Showing posts with label Fall crafts. Show all posts

Monday, September 21, 2015

Pumpkin Pancakes (GF)

I came up with this PUMPKIN PANCAKE recipe years ago and it remains a favorite in our house! Every Fall I wait for that first cold and rainy day and we have pumpkin pancakes for dinner! Paired with some bacon and homemade, baked apples, the meal couldn't be more cozy, more filling and it couldn't be easier to make! L likes to eat hers with her hands...with a couple apple slices folded inside of a pancake it's like a little taco! At times, I've made three or four huge pancakes, layered baked apples in-between, and served this up as a Pumpkin-Apple Cake! Such a yummy side to a fall soup or stew! 


You'd never know that the pancakes are low-fat. If you want to make them completely fat-free, replace the eggs with 3 egg whites. You can't even tell the difference! We make our pancakes with an all-purpose, Gluten-Free flour and they come out just fine. Go ahead and use whatever flour you fancy though...they'd be good with a whole wheat variety or your regular, unbleached white flour. 

Ingredients:
1 cup flour
1 tsp baking powder
2 Tbsp brown sugar
1/4 tsp cinnamon
dash of ginger and/or nutmeg
1/2 tsp salt 
2 eggs
1 cup plain, fat-free yogurt
1/2 cup canned pumpkin
1/4 cup unsweetened applesauce
1 tsp vanilla
1 box raisins (2 oz.) optional
3/4 cup milk or water

Mix dry ingredients thoroughly in a large mixing-bowl w/ hands or spatula.
In a separate bowl, combine eggs, pumpkin and liquid ingredients. Beat well.
Make a small well in center of dry ingredients and slowly beat in the liquid ingredients. Beat until contents are thoroughly mixed, but not too long. Add additional water to desired consistency. Stir in raisins with a spatula (optional).

Spray a large skillet lightly with non-stick cooking spray. Put over medium heat. Pan is ready when water droplets quickly sizzle and evaporate. 

Serves 2-3. Yummm!!! Enjoy!!!

Wednesday, July 15, 2015

DIY Toy Catapult

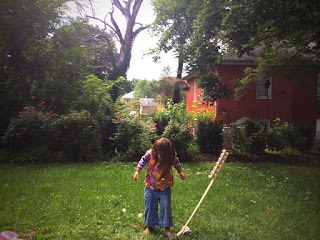
What kid (or adult) doesn't love launching things through the air? This DIY TOY CATAPULT takes only minutes to put together and your kids will play with it for hours...days even! I love how kids naturally experiment while playing with this toy. Even as young as three, L was moving the can (the fulcrum) around, placing the balls in various slots, and went on to launch her toy parachute, as well as her shoes! So much fun!!!


Materials needed:
-yard stick
-can of food 
-egg carton
-scissors
-hot glue gun
-permanent markers (optional)

Things to launch:
-ping pong balls
-pom poms
-cotton balls
-plastic figurines (fairies, dinosaurs, army men)
-marshmallows or cereal (to catch in one's mouth)


First, cut your egg carton in half.


Using a hot glue gun, glue the egg carton onto one end of your yard stick. (Don't worry...when your kids are done playing with their catapult, the egg carton and glue should peel right off the yard stick! I take ours apart every time we're finished playing with it!)


Next, number your egg carton slots and your ping pong balls. This step is optional, but it makes it easy to keep track of what ball goes the farthest and which slots you're putting things into...especially if you're launching multiple balls at once!


The set-up of your catapult is easy...just place the can on it's side in the grass (keeps it from rolling) and place the yardstick on top. Fill the slots with your projectiles!


Now, time to play!!!
Launching balls...


 Parachutes...


 And L's shoes...


What will you all send flying through the air???

If your kids like the catapult, they'll definitely love making POCKET PARACHUTES...another "make something from nothing" craft! Enjoy!


Sunday, April 26, 2015

Jam Jar Fairy House / Jam Jar Gnome Home

The other night I had a hard time falling asleep because I couldn't stop brainstorming about how to turn a jar into a fairy house. (Only me...I know.) I knew I wanted to make it so at night the windows and door would light up; the house needed to be sturdy enough to stand up to the elements outdoors; and I wanted to use craft materials we already had around the house. Finally I had a eureka moment...why not use my beloved hot glue gun!?! So many people think hot glue guns are just for gluing things together, but they can add texture and dimension to your work as well. I'm super excited to share with you this simple tutorial for making JAM JAR FAIRY HOUSES & GNOME HOMES! They really are adorable!


Materials needed:
-jars
-hot glue gun and glue
-acrylic paints
-preserved moss, tree bark, or dried leaves
-dried flowers 
-a bead or button
-tea lights (battery operated)


First, decide which direction you'd like your jar to stand. For instance, my smallest JAM JAR FAIRY HOUSE stands on its lid, but the larger one (made from an apple sauce jar) stands upright. Using your hot glue gun, "draw" a door and windows on your house. Then, fill in the walls of the house with vertical lines of your hot glue. Try to draw them on in long, fluid strokes, but the house by no means needs to be perfect. Each lil blip or quirk, will give your fairy house more character!


Next, paint the inside of the jar where your windows and door are located. Keep in mind that you'll want some light to shine through at night, so don't pick colors too dark or layer the paint too thick. 


After you've painted the inside, paint the outside of the jar brown. Carefully go around each window and the doorway. 


After the paint dries, the final step is gluing on dried moss and some tiny dried flowers. For our little jam jar fairy house, I glued moss on the top of the house (bottom of the jar) and along the edges of the lid. You can find preserved moss at your local craft store or, if you like, just use natural materials found in your own backyard...twigs, tree bark, fallen leaves, helicopter seeds, acorns. 


You can display your fairy houses inside or outside. To light them up at night, just place a little, battery operated, tea light inside. Enjoy!


If you're giving a JAM JAR FAIRY HOUSE away as a gift, don't forget to include some fairies and some fairy furniture tucked away inside the jar!


Sunday, January 11, 2015

Winter Shelter for Strays

Though we don't own any furry pets ourselves, our neighborhood seems to have its own little cat community. On any given day we may have up to 5 or 6 cats playing in our yard, hiding under our front porch or napping beneath our Little Free Library. Some of the cats have collars and tags, though quite a few do not. With the temperatures dropping well below freezing, L and I decided to make a warm place for our kitty friends to rest. 


Materials needed:
-styrofoam cooler (found at your local grocery store)
-knife
-paints (optional)
-old towels or bedding
-tape

First, remove the lid and turn the cooler over. Using a knife, cut a small doorway for the cats to go in and out. Next, paint the cooler whatever snazzy way you like! 


Once the paint is dry, fold up some old towels or bedding (we cut up an old mattress pad) and place it inside the lid. 


Put the cooler on top of the lid and tape it in place. 


(My friend Helen takes this project a step further...she places the styrofoam cooler inside a plastic rubbermaid-like box with a hole cut out and layers hay in between! Extra warm and cozy!)

Now for the final step, find a safe place near your home to put your WINTER SHELTER FOR STRAYS, preferably up against a building and out of the wind. 


We put our Winter Shelter in our backyard where we often see cats passing through and, an extra bonus, we can see the shelter from our kitchen window. I know L will be watching for her feline friends first thing every morning! She was so proud today knowing she was helping others!