Monday, March 9, 2015

Crazy Colored Easter Eggs

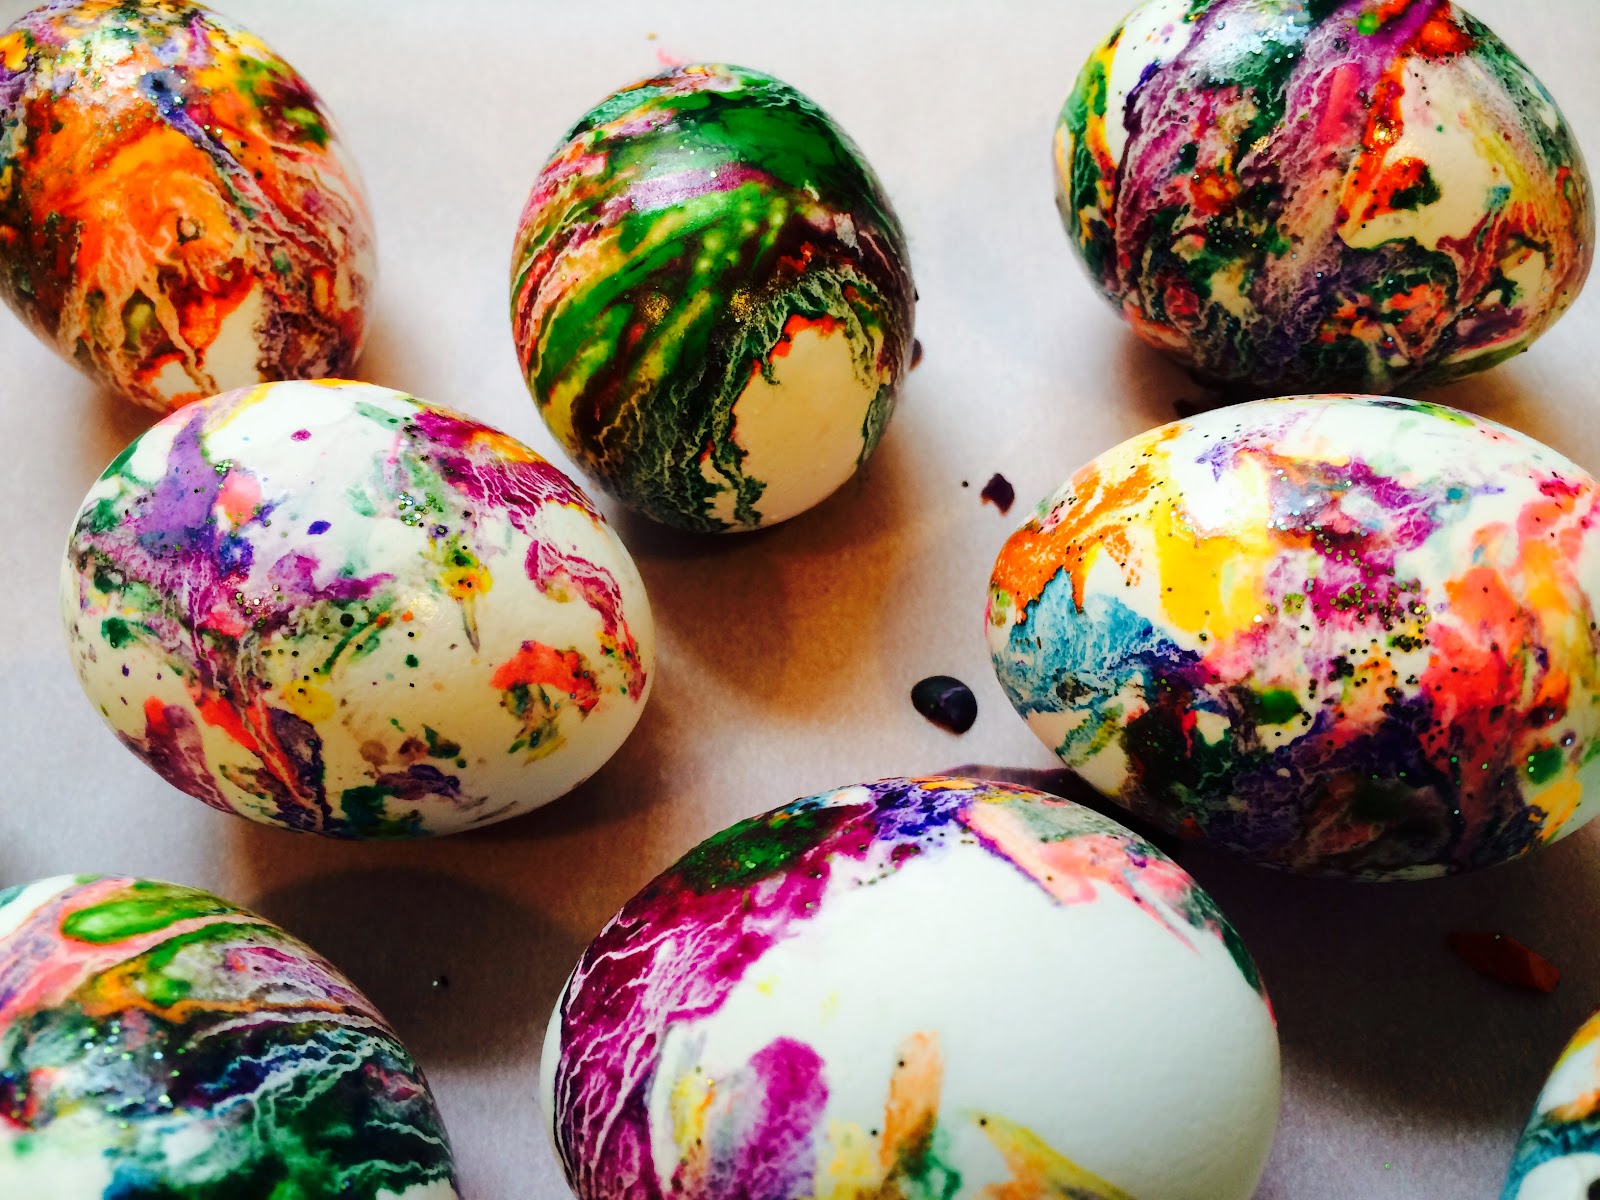
Last year was the first time we colored our Easter eggs in this fashion and oh my gosh, was it easy!!! These CRAZY COLORED EASTER EGGS are much cleaner and quicker to make than the traditional dyed Easter eggs! And aren't they just beautiful???


Materials needed:
-white eggs
-pot with water
-broken crayons
-tin foil
-large dish or pan
-fork
-tongs
-glitter (optional)
-towel for drying
-parchment paper


First, put your eggs in the pot of water and on your stovetop to boil. I've always heard that 13 minutes is the magic number for perfectly cooked, hard-boiled eggs. 


While your eggs cook, line your pan with tin foil. Also, prepare a place on your kitchen counter for your finished eggs...just a piece of parchment paper will do!


Make some crayon shavings, using a sharp knife. The more wild and beautiful your colors, the more wild and beautiful the eggs!


Sprinkle the crayon shavings on top of the tin foil and add glitter if you like too! You don't need a whole lot of crayon shavings...less is really better to avoid big color mixtures turning the eggs into yucky shades of brown. 


Once the eggs are cooked, use tongs to carefully move one egg at a time onto the towel to dry, and then into the pan of crayon shavings. Have your little one roll the egg around the shavings, pushing gently with the underside of a fork. Since the eggs are still very hot, the crayon shavings will melt immediately, painting the eggs!


After each egg is dyed, remove it with the tongs and lay it on the parchment paper to cool completely.  Repeat with the remaining eggs! 


I just love our CRAZY COLORED EASTER EGGS!!! Beautiful!!! Enjoy!

Tuesday, March 3, 2015

I Spy Bottle and Games

How many of you grew up loving the "Where's Waldo?" books by Martin Handford or the "I Spy" books by Jean Marzollo and Walter Wick? My brothers, sisters and I adored them and now, L enjoys reading them too! The I SPY BOTTLE is very similar in principal and so much fun! It's a fully contained game...no pieces to lose or to pick up! We take our bottle with us to restaurants on occasion and always on long car trips. The I SPY BOTTLE would be great fun in a classroom too! Be sure to scroll down, after the "how to" I've shared a few ideas of games to play.


Materials needed:
-clear bottle with a wide mouth
-rice
-electrical tape
-lots of small objects

First, remove the label from your bottle and clean and dry it completely. Goo Gone always works great for removing any stickiness and label residue! Fill the bottle a little over halfway with white rice.

Next, drop your objects in. We used beads, a bouncy ball, a plastic ring, spoon, animal figures, a marble, dice, a stamp, buttons, a clothespin, a rubber band, a paperclip, a toy car, keys, a wine cork, and although pictured is a crayon, I switched it out with a paintbrush. I was afraid the crayon would melt if left in the car!


Once the rice and objects are inside the bottle, use electrical tape to seal the lid closed. You could always use super glue, but I was afraid a time would come that we'd want one of the objects locked inside! 


Now, time to shake your bottle up and play!!!


Different ways to play:
-Call out the color of an object..."I spy something green!"...and have the other person find it.
-Call out the function of an object..."I spy something that makes art!"..."A paintbrush!"
-Things that rhyme. "I spy something that rhymes with 'moon.'"..."Spoon!"
-If your children can read, you could make little cards that go along with the I SPY BOTTLE too. How perfect would that be for a long car ride? Easy entertainment! Enjoy!!!


Sunday, March 1, 2015

Homemade Butter in a Jar

Have you ever been to a restaurant that along with fresh, baked bread served homemade butter? It's the smoothest, fluffiest, creamiest butter you've ever tasted and truly, nothing compares to it! Now you can make your own at home in only 10 minutes! This afternoon L and I made HOMEMADE BUTTER IN A JAR and it was so easy, so delicious, I may never buy butter from the store again!


Ingredients/Materials needed:
-heavy cream
-jar
-marble


While I made butter in a jar, L made some in a small plastic container with a screw-on lid...perfect for little hands!


First, fill your jar half-way with heavy cream. Add a clean marble and screw the lid on tight. The marble speeds up the process, churning the butter a little quicker, but you can make butter with just a jar too!


Next, shake, shake, shake! Shake the jar for a full 10 minutes! After about 5 minutes, the contents will be thick like whipping cream.


Continue to shake! If you get bored, turn some music on and dance while you shake! As the cream turns to butter, you'll hear the marble clanking less and less and eventually you won't hear it at all. 


Some people end up with thick butter at the bottom and a layer of liquid at top...if that happens, just pour the liquid off the top. That's the butter milk! Ours never separated and we ended up with just butter, through and through. Absolutely delicious, light and creamy butter! 


Spread on top of fresh, baked bread it could've been a meal in itself! I think next, we'll try making an herbed butter or homemade honey butter! Mmm... Enjoy!


Wednesday, February 25, 2015

DIY Tin Can Bird Feeder #2

To celebrate the last week of National Bird Feeding Month, L and I made these adorable TIN CAN BIRD FEEDERS! They are really easy to make, look beautiful and cost nothing...just go digging through your recyclables! Not only will the birds love this winter treat, this bird feeder would make a fantastic gift for your children to make for a friend, parent or grandparent! 


Materials needed:
-tin can w/ lid
-wooden paint stirrer
-pliers
-acrylic paints
-hot glue gun
-string
-glossy sealant (optional)
-church key can and bottle opener (optional)
-bird seed


First, make sure your can is clean and remove the label.


Using your hands, carefully bend the lid of the can in half. Using pliers, squeeze it flat.


Using the hot glue gun, glue the paint stirrer inside the can. You can break the stirrer if it's too long. This will be the birds' perch.


Next, glue the bent lid back into the can as pictured. Try not to make a huge mess with the hot glue gun, but if the glue shows it is no big deal...you will paint over it next. 


Paint the can any way you like. 


After the paint dries, you can use the can opener to make holes in the can from where you'll hang it on a string. On one of our cans I placed two holes on the top...this bird feeder will hang from an old clothes line end. 


On our second can I made holes in the back of the bird feeder...this one we will tie onto a fence. I was careful to put the holes in the can after we painted it, because I wanted to avoid any sharp edges while L was handling the bird feeder.


If you'd like your bird feeder to have a shiny, glossy finish, spray the can with a glossy sealant. It only takes 15-30 min to dry and will help protect the paint as well!


Thread string through the holes of the bird feeder and fill with bird seed!


Now, find the perfect spot to hang your TIN CAN BIRD FEEDER! We placed one of ours right outside our kitchen window...the girls will love watching their little wildlife friends snack throughout the day! (The first bird we catch on camera I'll be sure to update to the blog and share on our FaceBook page!) Enjoy!


In case you missed it, here's the first DIY TIN CAN BIRD FEEDER we made! Another fun nature craft!