Wednesday, June 10, 2015

DIY Pocket Parachute

What kid doesn't love throwing a toy parachute around?!! And what parent doesn't love a toy that costs nothing, takes less than 5 minutes to make, and entertains your kids for hours on end?!! I made this DIY POCKET PARACHUTE for L on a rainy day last week...as soon as there was a break in the weather, we were out the door throwing the parachute all around town. L dropped the parachute off the steps of the old courthouse, a church, the library, a little pavilion stage, and she climbed up a tree and dropped it down as well. This pocket parachute is so simple, so easy, and so much fun!!!


Materials needed:
-plastic bag
-food pouch cap
-string
-scissors
-an awl (or screwdriver)


If you don't have a food pouch cap, a toy wheel, some safety pins, paper clips or a wine cork could be used as well...get creative with what you have on hand! 

First, cut the plastic bag into a square at least 12x12 inches.


Cut your string into 4 equal pieces, all approximately 15 inches long. 


Using the awl, carefully poke a hole through the center of the food pouch cap. 


Also, poke holes into each corner of the square you cut from the plastic bag. Make each hole 1/2 an inch from the edges.


Tie a piece of string onto each corner, using a double knot. 


Next, gather all the strings together and tie them together with one overhand knot, about 3 inches from the end. 


Thread two of the strings through the center of the food pouch cap and thread the other two through the side. Tie the ends together with a double knot. 


Too easy, right? Now time to play!!! It's just as much fun trying to catch the parachute as it is to throw it!


If your kids are older, they can experiment by making various parachutes...some out of bigger pieces of plastic, longer strings and cutting a hole in the center parachute as well. Enjoy!!!

Wednesday, June 3, 2015

Patricia Polacco's THUNDER CAKE RECIPE

"Grandma looked at the horizon, drew a deep breath and said, 'This is Thunder Cake baking weather, all right. Looks like a storm coming to me.'"


If you haven't read the book "Thunder Cake" by Patricia Polacco, get yourself to the library or a local book store and get your hands on a copy pronto...you and your kids will love it! The story centers around the author and her grandmother (her Babushka) and the summer storms she feared as a little girl, at her grandmother's farm in Michigan. I've loved reading this book ever since I was a little girl and now L adores it as well. 


With the summer heat and thunderstorms we've been having lately, I decided it was definitely time to try our hand at baking some real Thunder Cake for ourselves! It's fun to make memories with your little ones and read this book as your Thunder Cake is baking in the oven...the perfect activity for a lazy, stormy, summer afternoon. It really seems like magic to smell the chocolaty cake baking in your own home as the little girl and her Babushka are putting theirs into the oven as well!


The recipe calls for 1 cup of shortening; we used what we had -- 2 sticks of butter  -- and the result was still wonderful! With the secret ingredient of pureed tomatoes, the flavor of this chocolate cake is very unique, but very moist and delectable as well. I suggest serving your Thunder Cake with extra strawberries...they pair so well with the hint of tomato and make the desert complete! 

As instructed in the book:
Cream together, one at a time...
1 cup shortening (or 2 sticks of softened butter)
1 3/4 cup sugar
1 teaspoon vanilla
3 eggs, separated (Blend yolks in. Beat whites until they are stiff, then fold in after the tomatoes.)
1 cup cold water
1/3 cup fresh, pureed tomatoes

Sift together...
2 1/2 cups cake flour (We used all-purpose, Gluten Free flour.)
1/2 cup dry cocoa
1 1/2 teaspoon baking soda
1 teaspoon salt

Mix dry mixture into creamy mixture.
Bake in two greased and floured 8 1/2-inch round pans at 350 degrees for 35 to 40 minutes. 
Frost with chocolate butter frosting. Top with strawberries.


We used this chocolate buttercream frosting recipe because I had all the ingredients on hand and it was quick and easy. Feel free to use your favorite chocolate buttercream recipe in its place! 

Enjoy!!!

Polacco, Patricia. "Thunder Cake." New York: Scholastic Inc., 1990. Print. 

Monday, June 1, 2015

Glow-in-the-Dark Bath

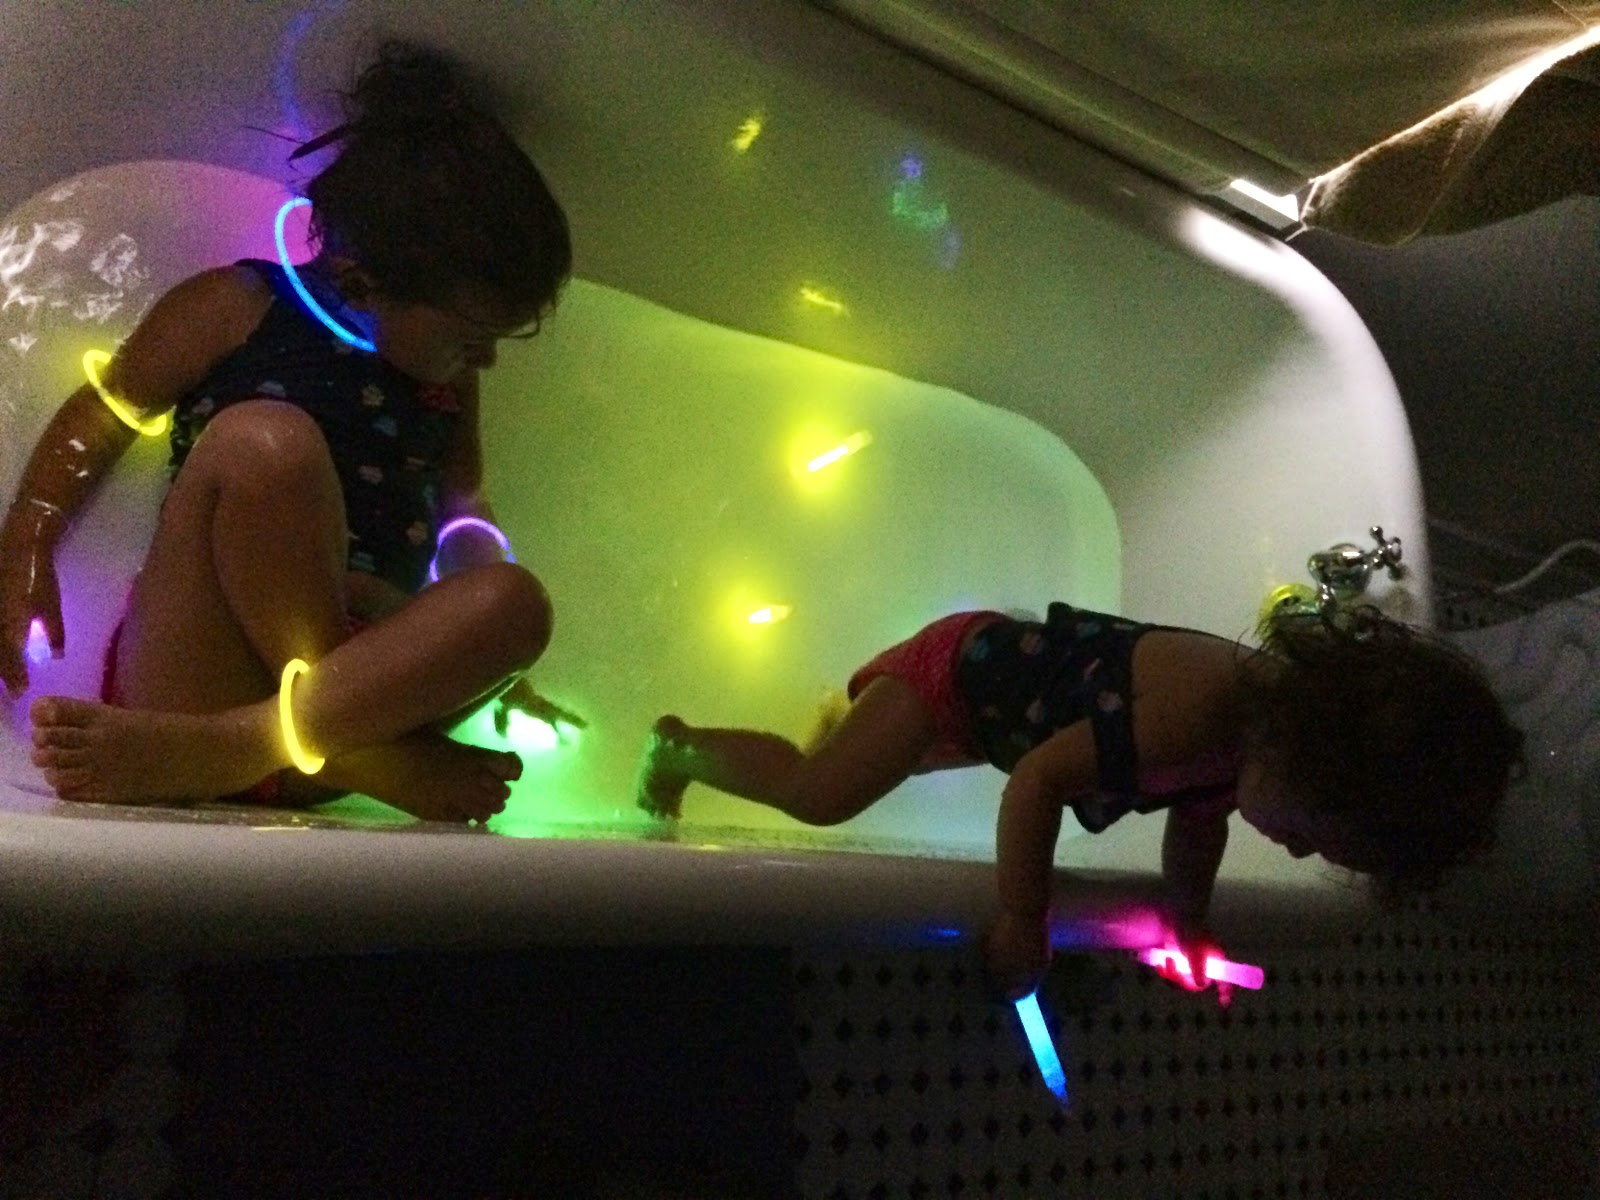
A couple weeks ago L and I walked down the street to check out a kids' festival going on in town. Our favorite part was some "Glow-in-the-Dark Yoga" going on at a local yoga studio. While the kids danced and froze into yoga poses with their glow bracelets on, the skies opened up into a torrential downpour outside. (I thought we'd need a canoe to get home.) Of course L and I embraced mother nature as we danced and splashed the whole way home. Cold and muddy, our next stop was a hot and soapy bath...with the lights off and our glow bracelets still on!!! It was silly, but so cool...I don't know why I never thought of it before! 


While lil ones love the idea of glow sticks, our kids are rarely up late enough to play with them in the dark. Turning the lights off at bath time and adding some glow sticks and glow bracelets to the water is perfect! Glow sticks only cost $1 to $2 dollars for a pack of 5-10.


Many bathrooms don't have windows, so a glow-in-the-dark bath can be done at any time of day. 


Make sure you keep an eye on your children while taking a glow bath, many glow sticks suggest kids be at least 8 years old to play with them. You definitely want to make sure your little teethers keep them out of their mouths! 


You can even add some "glow-in-the-dark bottles" to the mix as well! Enjoy!!!


Thursday, May 28, 2015

DIY Pool Toys / DIY Bath Toys

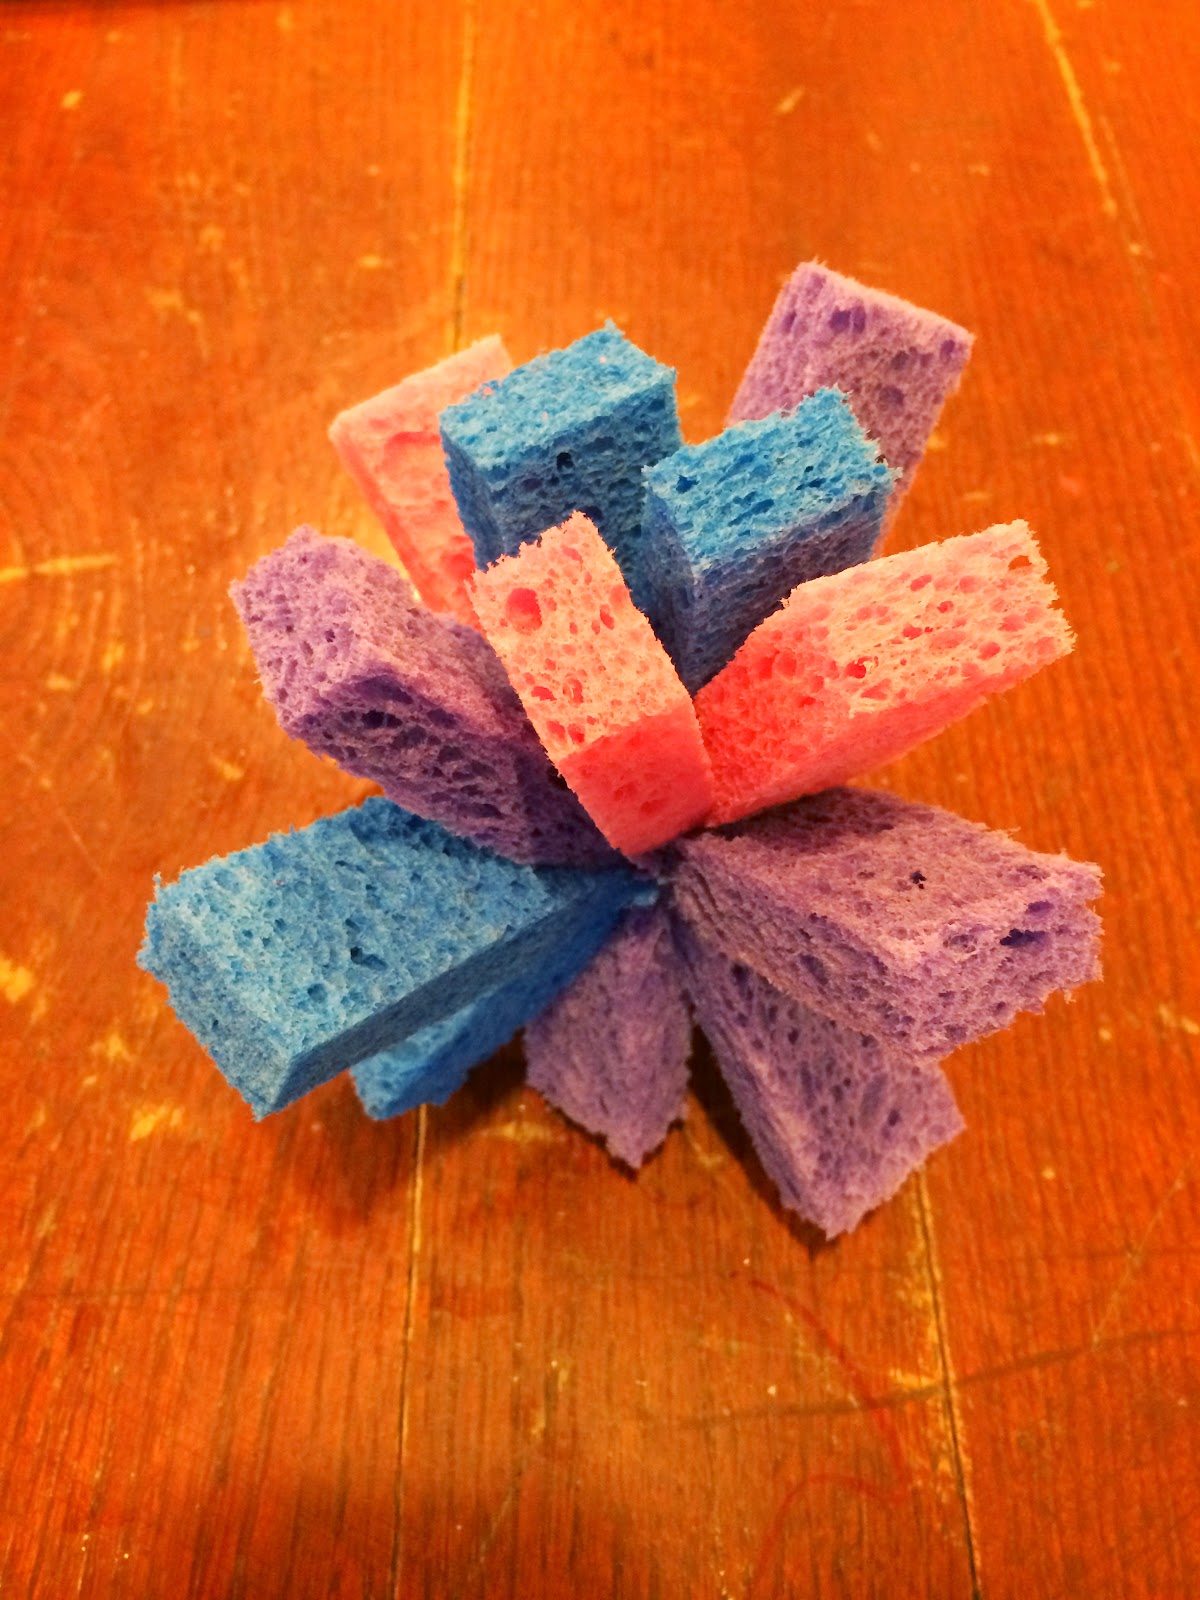
With the pools opening last weekend and the last day of school yesterday, Summertime is here!!! These are some fun DIY POOL TOYS that take just minutes to make. We like to throw ours around, splat them on the pavement and L likes to soak hers in water, then draw with it on the pavement. If you don't have a pool nearby, just fill up some buckets of water, toss in these fun and funky toys and play a wet and refreshing game of catch in the backyard. So much fun! (Be sure to scroll down to the bottom for some other DIY POOL TOY ideas too!)


Materials needed:
-3 sponges
-1 elastic hair band
-scissors


First, cut the sponges long-ways into 3 equal sections.


Next, stack them up.


And lastly, tie a hair band around the pile. 


Too easy and so much fun!!!


Other fun and easy pool toy ideas? 
A large paintbrush! Your kids will have a blast painting with water on the pool deck or even outside on the sidewalk.


We love playing with these sensory bottles in the water too! Both the "baby sensory bottles" and the "sparkle bottles" are fun to bounce around. They are quick and easy to make and are fantastic pool toys for the little ones!


Monday, May 25, 2015

Tin Foil Jelly Fish Craft

I love this super cute, jelly fish craft for so many reasons. Our TIN FOIL JELLY FISH were inspired by a trip to the Baltimore Aquarium and the girls' fascination with "The Jelly Fish Invasion" exhibit. (Super cool...if you are anywhere near Baltimore, go see it!!!) I love that this craft costs nearly nothing to make and L learned all about textures and rubbings while coloring the foil. And I LOVE the way our jelly fish look hanging in our kitchen window. If you can, place them near an air vent...when the air kicks on the jelly fish will come to life, dancing and swimming in the sun!


"The Jelly Fish Invasion" at the Baltimore Aquarium...

Materials needed:
-tin foil
-permanent markers
-egg cartons
-other small, plastic containers (think applesauce, olives, etc.)
-string or fishing line
-painted stick 
-tape
-scissors
-paperclips
-nail or sharp-tipped tool


First, cut your egg carton into little jelly fish shapes.


Next, take a few sheets of tin foil and have your children color them. This is a great opportunity to make rubbings. L colored on the patio furniture and bricks, over tree bark, on the textured sidewalk and on her slide. Not entirely necessary, but why not!? Your kids can also try making different patterns if coloring on a flat surface...stripes, dots, swirls, anything goes!


Cut the tin foil into little squares and have your kids wrap the egg carton cut outs with the foil. You may have to help them smooth down the outer edges. 


If you have some small, plastic containers to use as well, first poke a hole in the center. Next, cover the containers with the foil too. 


Cut strips of tin foil and tape the strips, 2 or 3 at a time, to the inside of your jelly fish. 


Using a nail or sharp tool, poke a hole into the top of each jelly fish.


Now, it's time to hang your jelly fish up. I knew ours would go in our kitchen window, so we hung the jelly fish along a painted stick. You could also make one large jelly fish and hang the smaller ones underneath. That method would be cute if hanging your jelly fish up under a light, in the center of a room.


We hung our jelly fish by stringing them onto fishing line and tying the line to a paperclip underneath each one. Some hung on their own, while others had a second jelly fish hanging underneath. Get creative and have fun with it! 


When doing projects like this, it's definitely easier to have the jelly fish hanging while you are tying them on rather than laying flat on the ground. 


Put them up to display and enjoy!!!