Showing posts with label summer crafts. Show all posts

Wednesday, September 2, 2015

DIY Toy Sail Boat

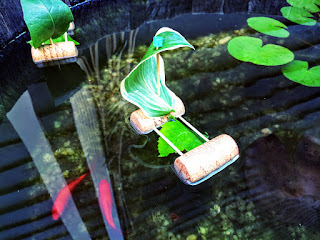
One evening this summer, while we were getting ready for bath time, L pulled a wine cork out of her pocket. She had been saving it all day to float it around and play with in the bath tub. That got me thinking...I knew with a few toothpicks and some leaves we could turn her wine cork into a little sail boat! Leaves work great for this project, because they're naturally water-proof and easily replaceable! 


Materials needed:
-2 wine corks
-4 toothpicks
-2 leaves
-old pencil
-scissors


Take one of the wine corks and stick three toothpicks into it, all pointing in the same direction in a line.


Next, push the second wine cork into the opposite ends of the toothpicks. 


Stick one more toothpick vertically into the middle of one of the corks. 


Find a medium-sized leaf and weave it through the bottom toothpicks. We used a balloon flower leaf. This step isn't necessary, but it makes a nice lil bed for anything you may want to sail on top...a bug, a rock, a fairy friend.


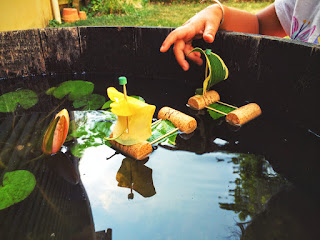
Next, find a slightly larger leaf and thread it onto the vertical toothpick, making a sail. We found the hosta leaves to work best for this, though any thick and sturdy leaf will do! 


To make the sail boat safer for little hands, twist an eraser off the top of an old pencil. Cut it in half with scissors and push it onto the top of the sail. 


Now, time to play! L had hours of fun blowing her boats around our rain barrel! 


The boats may not seem like much, but ours withstood some submarine plunges under the water and lasted through two nights of bath time play! Tomorrow, we'll replace the leaves and keep sailing!


Enjoy!!!

Tuesday, August 4, 2015

Lemonade Play Dough

We love scented play dough at Our Beautifully Messy House and summertime is the perfect time to make LEMONADE PLAY DOUGH! 


I came up with this recipe a couple weeks ago, while mixing up some play dough to take with us on vacation to the beach. And the kids LOVED it!!! It's always nice having play dough handy for any down-time whether you're at the beach with family or you're having friends over for a play date. 


I've tried making citrus-scented play dough in the past with lemon extracts and oils, but that summery lemonade scent never comes through. Adding a packet or two of lemonade mix did the trick...it was super-quick and easy and smells delicious! I suggest using a sugar-free lemonade mix (Crystal Light brand works great!) so your play dough doesn't get super sticky with the added sugar. 


When I made our lemonade play dough I wanted to make both yellow and pink dough, so I split the dough and added the food coloring before kneading it. The colors came out just fine! This play dough takes only a few minutes to make, but stored in a gallon-sized bag or an air-tight container, it'll keep for nearly a year! This recipe makes plenty for 2 or 3 kids to play with! 


My tip to keep your kids entertained playing with play dough for longer: Start off with plain play dough. Let them play 15 or 20 minutes, then throw some glitter into the mix. Once their attention starts to drift, add some colorful beads or buttons. Add some measuring cups and kitchen utensils, some lil plastic dinosaurs or army men. Just don't give them everything at once, instead add to the play dough in intervals...works every time! 

Ingredients:
2 cups + 1/2 cup flour
1/2 cup salt
2 Tbsp cream of tartar
2 Tbsp vegetable oil
1.5 cups boiling water
food coloring
1-2 packets lemonade mix

First, put the water on to boil. Add a few drops of food coloring to the water (yellow or pink). As the water is heating up, mix 2 cups of flour, salt, cream of tartar and one packet of lemonade mix in a large mixing bowl. Then add and mix the vegetable oil into the flour mixture. Once the water is boiling, add it to the bowl and mix with a spatula. The dough will be a sticky mess while warm. Mix it as best you can, then let it cool off. After a few minutes cooling off, sprinkle your working surface with some of the remaining flour. Dump the play dough onto the flour, adding more flour to the top, and knead the dough. Continue working with the dough, adding a bit of flour as needed, til the dough is not sticky anymore and you've reached the desired consistency. If you like, sprinkle in another packet of lemonade mix to dough! Yum yum, Summer!!! Enjoy! 

Wednesday, July 15, 2015

DIY Toy Catapult

What kid (or adult) doesn't love launching things through the air? This DIY TOY CATAPULT takes only minutes to put together and your kids will play with it for hours...days even! I love how kids naturally experiment while playing with this toy. Even as young as three, L was moving the can (the fulcrum) around, placing the balls in various slots, and went on to launch her toy parachute, as well as her shoes! So much fun!!!


Materials needed:
-yard stick
-can of food 
-egg carton
-scissors
-hot glue gun
-permanent markers (optional)

Things to launch:
-ping pong balls
-pom poms
-cotton balls
-plastic figurines (fairies, dinosaurs, army men)
-marshmallows or cereal (to catch in one's mouth)


First, cut your egg carton in half.


Using a hot glue gun, glue the egg carton onto one end of your yard stick. (Don't worry...when your kids are done playing with their catapult, the egg carton and glue should peel right off the yard stick! I take ours apart every time we're finished playing with it!)


Next, number your egg carton slots and your ping pong balls. This step is optional, but it makes it easy to keep track of what ball goes the farthest and which slots you're putting things into...especially if you're launching multiple balls at once!


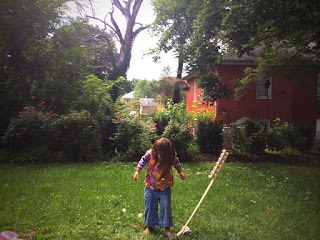
The set-up of your catapult is easy...just place the can on it's side in the grass (keeps it from rolling) and place the yardstick on top. Fill the slots with your projectiles!


Now, time to play!!!
Launching balls...


 Parachutes...


 And L's shoes...


What will you all send flying through the air???

If your kids like the catapult, they'll definitely love making POCKET PARACHUTES...another "make something from nothing" craft! Enjoy!


Sunday, July 12, 2015

DIY Citrus Stamps

How cute are these DIY CITRUS STAMPS we made this week? They really were simple to make and the outcome is adorable...perfect for Summer! L and I stamped t-shirts, tea towels, and a pillow case for her bed. Just think of the possibilities... You could use this stamping technique to brighten-up party invitations, gift bags, skirts, shorts, a tablecloth, shower curtain...the possibilities are endless (and sweet)! 


Materials needed:
-an orange, lemon, & lime
-tea towels, t-shirts, etc.
-knife
-acrylic or fabric paints
-flat, plastic lids or plates
-paper towels
-parchment paper


If you need to, iron your tea towels or t-shirts first! Protect your work area with parchment paper. (Usually I use cardboard or old newspapers for projects, but with this one I didn't want the texture of the cardboard to effect the stamping and I didn't want newspaper to discolor my cloth. Parchment paper was perfect!)


Next, cut your orange, lemon and lime in half with a sharp knife. If you like to, cut a little "handle" in each fruit half...makes stamping easier, especially for kids!


Turn the fruit over onto a paper towel, to soak up some of the juice from the fruits.


Next, squirt your paints onto plastic lids or plates.


Dip the sliced fruit into the paint. Blot it onto a paper towel, if there appears to be too much paint.


And press the fruit gently onto your cloth. Too easy, right!?


We experimented and made some of our tea towels patterned, while others we stamped randomly. The random was definitely our favorite...a little more carefree, like all things "summer" should be!


If you have some prints that are more solid looking (a bit too much paint), don't fret...just overlap another fruit in another color on top! It will look like you planned it that way all along!


Instead of stamping an entire tablecloth, you can just stamp tea towels and overlap them as we did here. Looks great on their own or with a solid tablecloth underneath!


Too cute, huh!?! Enjoy!!!