Tuesday, May 5, 2015

Giant Bubble Wands and a Homemade Bubble Solution Recipe

Did you ever make these GIANT BUBBLES when you were a kid? My siblings and I loved making them way back when! Recently, we had a bubble kit given to us with a wand included, but it was too big for L to do on her own...so, of course, I had to brainstorm and make a wand she could use as well! The best part about it was we already had all the materials we needed. If you don't have two rulers to use, two large mixing spoons or spatulas would probably work great too...anything with a hole at the end of the handle. Be sure to scroll down to the bottom for the HOMEMADE BUBBLE SOLUTION RECIPE. It's better than any store-bought variety and takes only a minute to make!


Materials Needed:
-2 plastic rulers
-yarn, 3-6 feet long
-binder ring, shower curtain ring, or a keychain ring
-homemade bubble solution (See below)


First, cut the string to suit your size...the shorter the person, the shorter the string! 


Next, thread the ring onto the string and tie both ends together with an overhand knot.


Thread a loop of yarn through the hole on one end of a ruler. Bring the loop up and over the opposite end of the ruler and pull it tight. (See pictures.)


Attach the other ruler the same way, leaving about 1 to 2 feet of yarn between the two rulers.


With the bubble solution in a large bowl or container, gently lower the yarn into the liquid. Make sure the yarn is soaked through. 


Next, carefully lift the yarn out of the bubble solution. Slowly and steadily, spread the rulers apart while walking backwards. If there is a breeze, make sure the wind is blowing on your back. 


To close the ginormous bubble, carefully bring the rulers together again. So cool!!!


HOMEMADE BUBBLE SOLUTION RECIPE

Ingredients:
-warm water
-sugar
-dish soap

Materials:
-measuring cup
-Tablespoon measuring spoon
-medium bowl or container
-spoon

Put one Tablespoon of sugar into your bowl or container. Pour 200 ml of warm water on top of the sugar and mix until all the sugar is dissolved. Add 50 ml of dish soap (30 ml if using ultra dish-washing detergent) and mix. Finally, add 300 ml of warm water to the mixture and mix.

That's it! This bubble solution is the best we've ever made! 


Have fun!!!

Be sure to check out our BUBBLE BLOBS & BUBBLE WORMS page too!


Wednesday, April 29, 2015

Doorknob Mushroom-Fairy Houses

Aren't these DOORKNOB MUSHROOM-FAIRY HOUSES the cutest??? I originally planned to just make mushrooms out of these little wooden knobs, but I just had to paint a little door and window on too. They're just so sweet! L painted hers knobs into multi-colored mushrooms today and they are already out in the garden! So easy and so much fun!


Materials needed:
-small wooden knobs w/ screws
-acrylic paint
-sealant spray
-egg carton (optional)


First, twist the screw into the knobs.


Next, paint your knobs. You can paint them to look like mushrooms or add a few extra details for a fairy house. Even a 3 year old can paint the knob to look like a cute, lil mushroom! 


After your knobs are painted, set them aside to dry. I suggest using an egg carton to prop the knobs up. Next, take them outside to spray with a coat of sealant. (The egg carton works great for this step too!)


Now for the fun part...tuck them away into your fairy garden, in a flower pot or in a wreath. Keep the screws in, just push them into the ground. Adorable! Might as well make a couple extra for family and friends!


If you like this one, you'll be sure to like our JAM JAR FAIRY HOUSES and GNOME HOMES too!


Sunday, April 26, 2015

Jam Jar Fairy House / Jam Jar Gnome Home

The other night I had a hard time falling asleep because I couldn't stop brainstorming about how to turn a jar into a fairy house. (Only me...I know.) I knew I wanted to make it so at night the windows and door would light up; the house needed to be sturdy enough to stand up to the elements outdoors; and I wanted to use craft materials we already had around the house. Finally I had a eureka moment...why not use my beloved hot glue gun!?! So many people think hot glue guns are just for gluing things together, but they can add texture and dimension to your work as well. I'm super excited to share with you this simple tutorial for making JAM JAR FAIRY HOUSES & GNOME HOMES! They really are adorable!


Materials needed:
-jars
-hot glue gun and glue
-acrylic paints
-preserved moss, tree bark, or dried leaves
-dried flowers 
-a bead or button
-tea lights (battery operated)


First, decide which direction you'd like your jar to stand. For instance, my smallest JAM JAR FAIRY HOUSE stands on its lid, but the larger one (made from an apple sauce jar) stands upright. Using your hot glue gun, "draw" a door and windows on your house. Then, fill in the walls of the house with vertical lines of your hot glue. Try to draw them on in long, fluid strokes, but the house by no means needs to be perfect. Each lil blip or quirk, will give your fairy house more character!


Next, paint the inside of the jar where your windows and door are located. Keep in mind that you'll want some light to shine through at night, so don't pick colors too dark or layer the paint too thick. 


After you've painted the inside, paint the outside of the jar brown. Carefully go around each window and the doorway. 


After the paint dries, the final step is gluing on dried moss and some tiny dried flowers. For our little jam jar fairy house, I glued moss on the top of the house (bottom of the jar) and along the edges of the lid. You can find preserved moss at your local craft store or, if you like, just use natural materials found in your own backyard...twigs, tree bark, fallen leaves, helicopter seeds, acorns. 


You can display your fairy houses inside or outside. To light them up at night, just place a little, battery operated, tea light inside. Enjoy!


If you're giving a JAM JAR FAIRY HOUSE away as a gift, don't forget to include some fairies and some fairy furniture tucked away inside the jar!


Monday, April 20, 2015

The Mud Kitchen

Our MUD KITCHEN might just be my favorite kids' project yet! I've been dreaming of building one for L since late last Summer and this Spring we went for it! Collecting things and building it was definitely fun for me...I love scouring antique shops and junk stores with an idea in mind. And now L has a blast playing in her MUD KITCHEN nearly every day! She's always loved digging in her dirt pit, so we set the mud kitchen up right beside it. 


Materials needed:
-old pots and pans, muffin pan, mixing bowls, old tea set
-cooking utensils and/or garden tools
-old rags
-shelving unit
-DIRT!!!


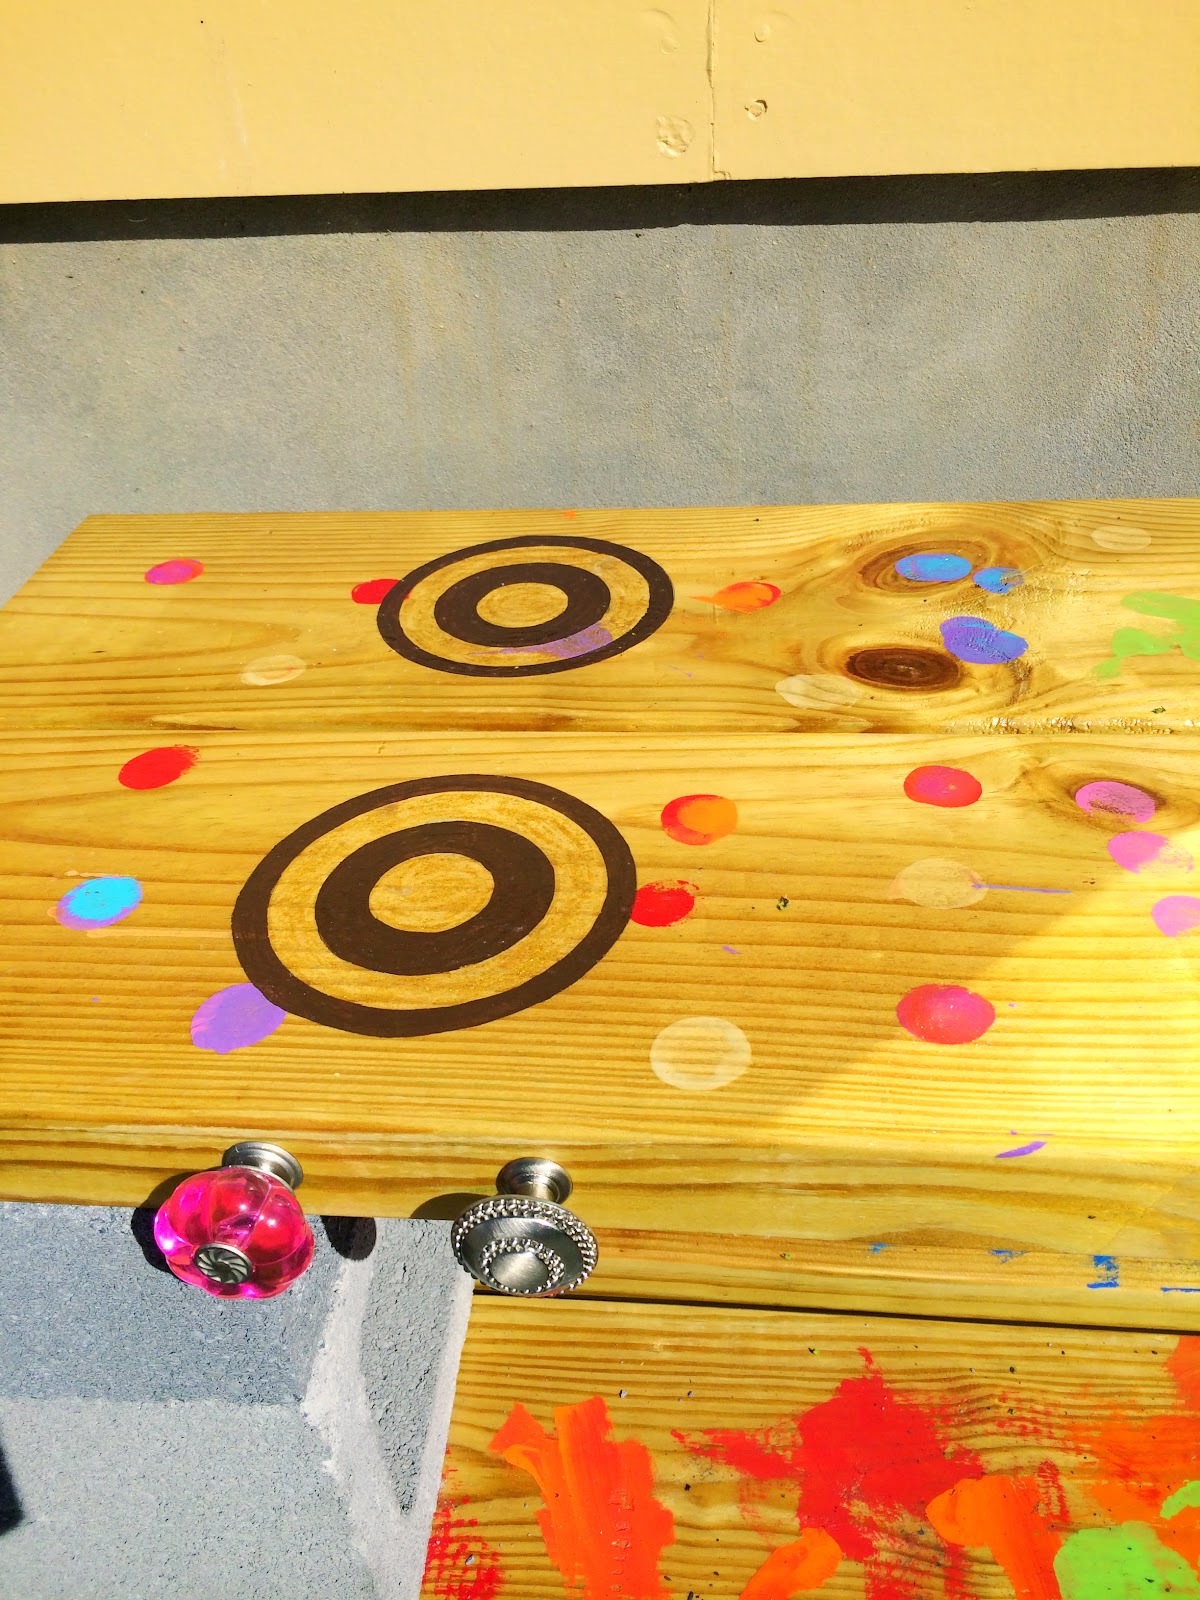
The best places to find things for your MUD KITCHEN are yard sales, flea markets, antique and junk stores. If you find a water-proof set of shelves or little bench, that would work great! We ended up making ours out of some lumber and cinder blocks. L helped sand and paint the wood, I painted two lil burners on the top pieces, and we finished it off with a few coats of polyurethane. I love that L was able to make it her own! 


We found this perfect mirror to attach to the kitchen for only $15 at a local antique store. I wanted a mirror for a bit of a "kitchen window" effect, plus it makes our tiny yard look a bit bigger! It was the only one I could find that had a wooden backing to it...most others were particle board or cardboard. Our mud kitchen is up against our house, a little bit protected by the weather, but when it pours rain the kitchen still gets wet. Make sure everything on your kitchen is more-or-less waterproof. 


Along with the burners I painted on top of the mud kitchen, we also attached two lil knobs (to turn the stove and oven on, of course)! You can find knobs really cheap at your local Habitat for Humanity or at your local hardware store. Since ours were attached to solid wood, I just glued them on with some superglue. So far it's worked great!


On the side of our mud kitchen, we attached two cute lil hooks. Again, we found them at a local antique/junk store for $1. They couldn't be more perfect! L hangs her lil dish rags on there and when she's all done playing with her kitchen each day, I have her clean it up. She brushes the dirt off with a dry rag, follows up with a wet rag, and she puts all her pots and pans away. 


Like many activities like this, my biggest tip to you would be to withhold some of the kitchen supplies, giving your kids a lil more day by day. On the first day I gave L her pot, pan, and mixing bowls. On the second day, we added an empty milk carton, egg carton and vanilla bottle. After that, we threw in a muffin pan and some old silicon muffin cups. I have an old child's tea set I'm saving for a special day as well. Keep things interesting and mix it up! 


Sparkle bottles would be a fun addition to your mud kitchen too! Not to mention, making some potions out there as well. (Tell me I'm not the only one who mixed up "magic potions" with water, dirt, wild onions and herbs as a kid!)


How much would your child LOVE a mud kitchen??? Mmm...mmm...mud pies, mud spaghetti, dirt scrambled eggs, mud muffins...