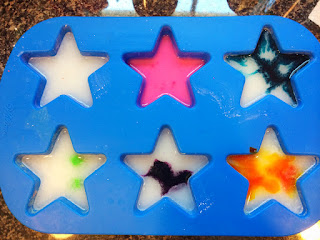
After we made "Homemade Sidewalk Chalk" the other day, I couldn't wait to make some FIZZY ICE CHALK as well! I looked around online and found all kinds of recipes and methods for ice-chalk and fizzy or erupting ice-chalk. L and I experimented and tried all the tricks...we added some of our own variations, and I'm happy to share those that worked best! I suggest making FIZZY ICE CHALK in the morning on a hot summer day, let it set-up for a few hours, and bring it outside to play with in the afternoon. We have a few batches sitting in our freezer right now, just waiting for a lull in the action so we can bring it outside to play with again. This time we made lots so there'd be plenty for the neighborhood kids to play with as well! We can't wait!
Materials needed:
-1/2 cup cornstarch
-1/2 cup baking soda
-food coloring (or tempera paint)
-1 cup water
-measuring cup
-silicone molds (or ice tray)
-spoon
-toothpicks
-vinegar
-spray bottle, squirt bottle, or infant medicine dropper
Using a measuring cup, combine 1/2 cup cornstarch with 1/2 cup baking soda. Mix together with a fork or spoon.
Add 1 cup water and mix gently, but thoroughly.
Next, carefully pour your mixture into the silicone molds or into your ice tray. If you don't have either available, you could use paper cups as well!
Add a few drops of food coloring or a squirt of tempera paint to each mold. (We tried both...the food coloring mixed better, but both worked fine!)
Using toothpicks, carefully mix each color.
Put the molds into the freezer for a few hours, til they set-up completely.
Before bringing the ice chalk out to play with, prepare your vinegar. You can put it into spray bottles, into squirt bottles (empty dish soap bottles work great), or pour the vinegar into small cups paired with a medicine dropper. All are great for little hands and developing motor skills...L's favorite is the medicine dropper method!
After the ice chalk is thoroughly frozen, bring it outside to play! One page online suggested painting the sidewalk first with water...we tried it, but didn't see much benefit in having the pavement wet. We had more fun coloring with the chalk on dry pavement! Experiment with it though...see what works for you!
After the kids are finished coloring (if they can wait that long!), it's time to bring out the vinegar. Spray or squirt the vinegar onto the ice-chalk and the ice-chalk pictures to watch it sizzle, fizz and erupt! This is definitely everyone's favorite part!
Take a moment to talk to your kids about chemical reactions and the result of a base (the baking soda) and an acid (the vinegar) coming together. L always likes to taste how salty the baking soda is compared to the sour smell of the vinegar. Summer science fun...I just love it! Enjoy!!!


No comments:
Post a Comment